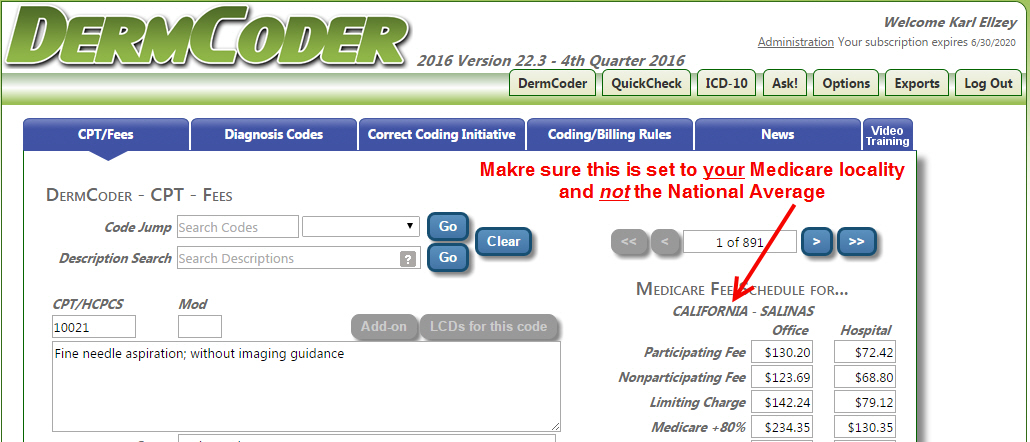
First, be sure you have set your locality in DermCoder, for your specific Medicare region. You can tell if you have not done this, because the fees listed on the right side of the main DermCoder screen will say “National Average” above the Participating Fee.
1. How to change your Medicare Locality to your local carrier.
a. First, click the middle tab towards the upper right of the main DermCoder screen that says “Options” (see image below)
b. Once the Options screen opens, there will be three blue tabs that are available. One that says Application, one says User, and another that says Notifications. The Application tab opens by default.
c. On the Application tab, to the right of the word Locality, is the Medicare region that is currently being used to calculated your feed. If you have NOT changed this it will say National Average. (see image below)
d. To change it, click the 'down arrow' or 'drop-down' towards the right of the Locality field and a list will appear. Scroll down and find the Medicare region/locality that matches your practice. For example, if you are in Atlanta, Georgia, choose the locality that says “Georgia – Atlanta.”
e. If you have multiple localities in your state, we also display the counties covered by that locality. Choose the one that most closely matches your practice's location.
f. Click the blue Save button.

g. Click the DermCoder tab towards the upper right of the screen. This always takes you back to the main DermCoder screen.
h. You should see that the Medicare Fees displayed on the right-half of the screen are now showing the Medicare locality you just selected.
Note: DermCoder will permanently REMEMBER these settings for your particular user log-in. You only have to do this once!
Note: each user needs to do this under their own Username log and password.
2. By default, DermCoder loads the current Medicare Fee Schedule and related code data each time you log in. However, you have the ability to look at different versions of DermCoder by following a few simple steps. This will be important after January 1st, when you may need to reference data from 2018 and earlier as you clean up old claims.
Here's how to look at different versions of DermCoder...
a. On the main CPT-Fees screen of DermCoder (the default screen after you log in), it will say to the right of the DermCoder logo at the top, the current version that is loaded. As of today, it displays 2018 Version 24.3 - 4th Quarter (the default version) in black italics.
b. With your mouse, click the actual text where it is displaying the default version (i.e., click where it says 2018 Version 24.3 - 4th Quarter).
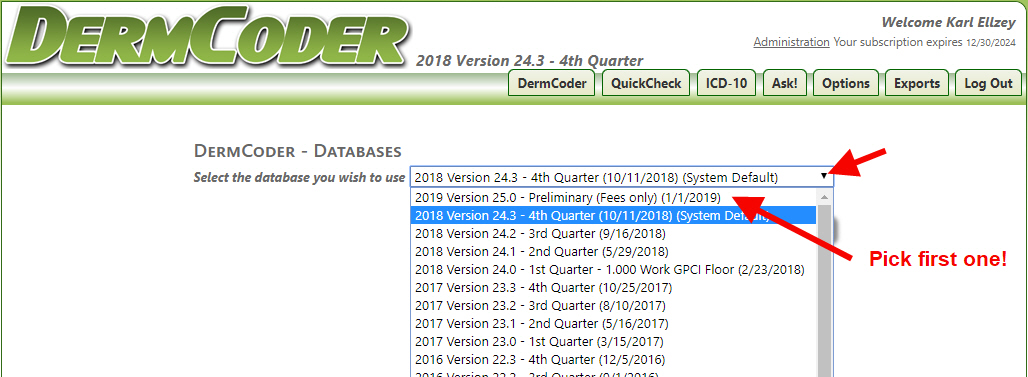
c. A new screen will appear showing you the available databases you can choose from.
d. From the drop-down field of databases (the down arrow), select another database to use.
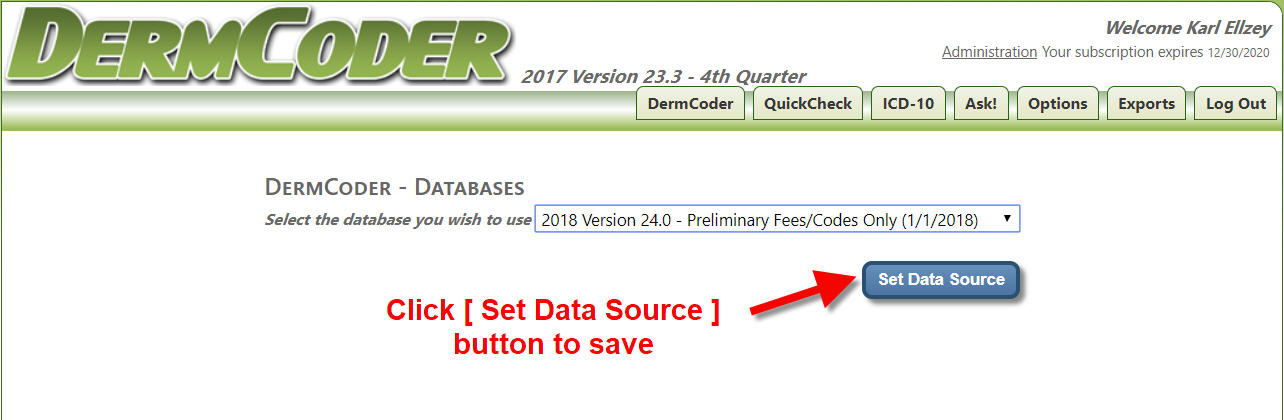
e. If you want to look at the new Medicare fees, select 2019 Version 25.0 - Preliminary (Fees only)
f. Click the blue Set Data Source button to save the selection
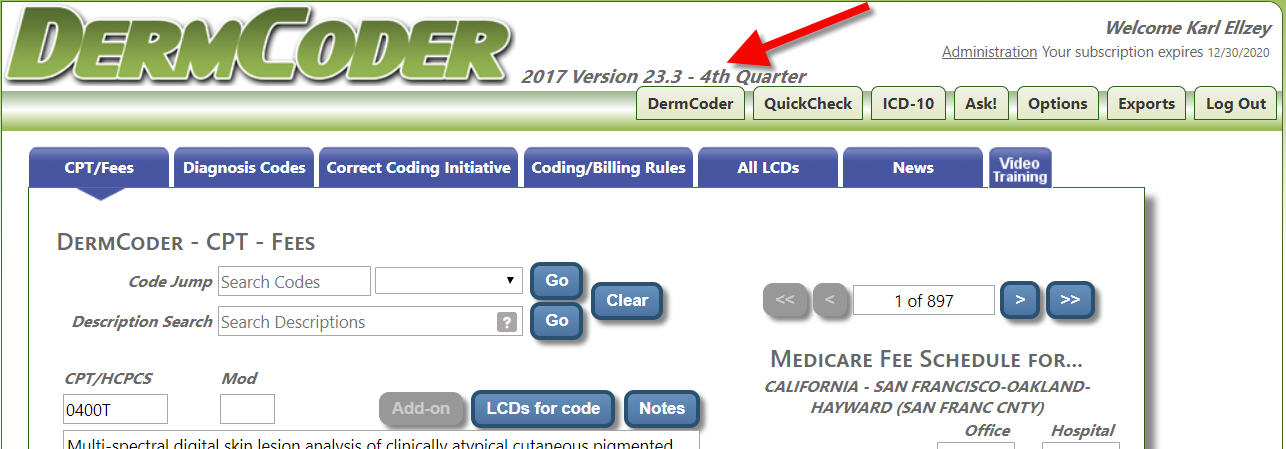
g. You will notice that to the right of the DermCoder logo at the top, the new database has been selected and is now displayed in bold RED text. The bold red text is used to let you know that you are not displaying the current data.
h. Click the DermCoder tab towards the upper right of the screen, to go back to the main DermCoder screen.
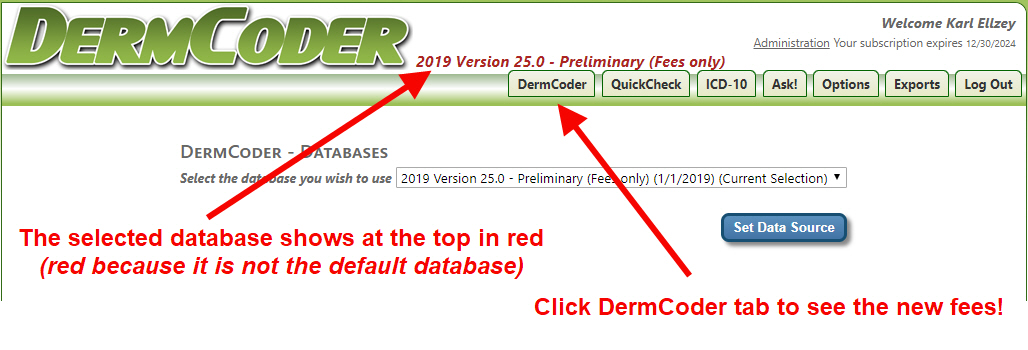
If you did everything CORRECTLY, it should look like this!

i. To revert back to default, follow steps a-f above or log out of DermCoder completely and log back in.
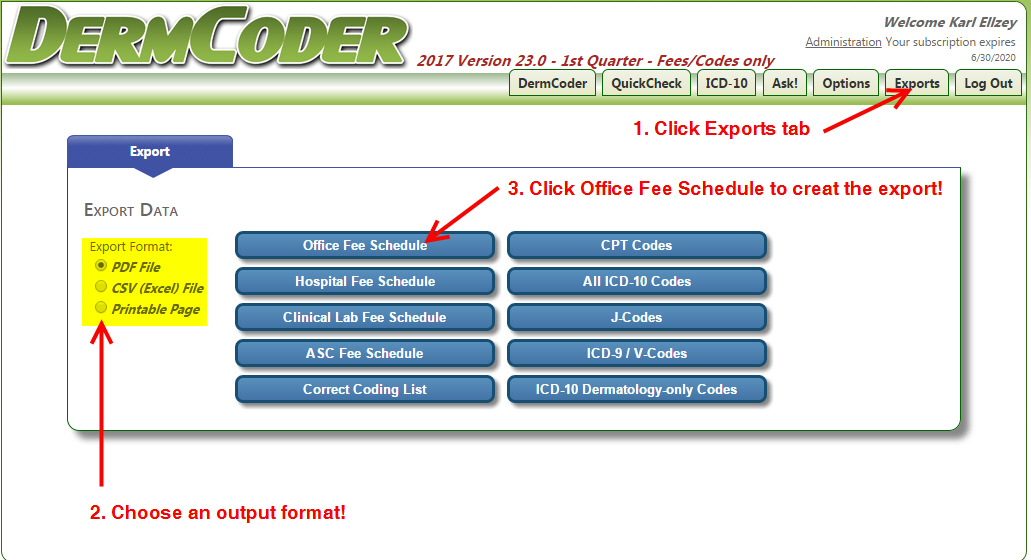
3. You can use the Exports tab towards the upper right of the main screen to print/export the complete 2019 Medicare Fee Schedule to PDF, Excel, or directly to your printer.
For additional tips and tricks, be sure to watch the YouTube training video:
|